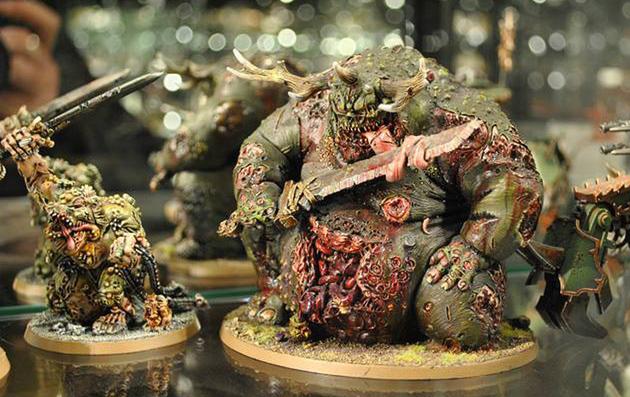
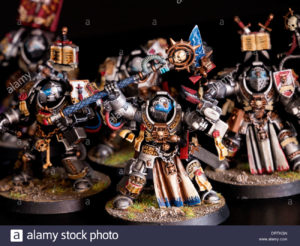
![]() 1983 saw the release of the Warhammer Fantasy Battles, a tabletop game built on strategy, logic and skill. Warhammer has since grown into a billion dollar industry involving novels, video games and a 2010 futuristic film, “Ultramarines: A Warhammer 40,000 Movie”. The intricately detailed miniatures by Citadel are a passion shared by many, each one painstakingly built and painted by it’s owner, as he readies his army to fight legendary battles against the forces of Chaos. The goal of any Warhammer gamer is to have an army they can be proud of, and a big part of that is obtained though the painting process.
1983 saw the release of the Warhammer Fantasy Battles, a tabletop game built on strategy, logic and skill. Warhammer has since grown into a billion dollar industry involving novels, video games and a 2010 futuristic film, “Ultramarines: A Warhammer 40,000 Movie”. The intricately detailed miniatures by Citadel are a passion shared by many, each one painstakingly built and painted by it’s owner, as he readies his army to fight legendary battles against the forces of Chaos. The goal of any Warhammer gamer is to have an army they can be proud of, and a big part of that is obtained though the painting process.
Getting Ready to Paint
if you are new to the world of Citadel miniatures, be prepared to become immersed in a well-designed, in depth world overflowing with Elves, Orcs, Dwarfs and more. Getting started is easy. If you’ve never painted miniatures before, start by collecting the proper supplies, such as primer made for plastic, small brushes, and paint. Next, line up your figures, and plan on how you’ll paint each one before you start. Considering the details, paint colors and painting techniques for each character beforehand makes the painting task more streamlined.
Whether you have purchased a kit which requires your figures to be assembled, or the Finecast figures, it’s important that you follow instructions for preparing and assembling your models properly. Take time to use the tools included to sand away mold seam lines, and polish your work with Citadel emery boards. The more finely tuned and polished your model, the better your paint job will be.
Clean and Prep your Warhammer Miniatures
If you’ve had your miniatures in a drawer, or have been playing with them, there is a good chance they will have accumulated a layer of dust, dirt and skin oils. In order to get a professional finish to your figures, you simply must ensure they are cleaned and dried first. Next, take your figures outside, in a well ventilated area and spray them with a good quality plastic primer. Depending on the temperature and humidity, let your pieces cure for about an hour then lightly touch them. If your finger does not stick to the surface, the figure is ready to paint.
 Beginning to Paint
Painting miniatures requires great attention to detail and concentration. Get yourself set up properly with a table magnifying lamp, good lighting, plenty of paper towels or rags. I prefer inexpensive microfiber towels you can get at a dollar store, as they don’t leave lint or dust behind. A nice, hand held magnifying glass for detail work can come in handy as well.
When it comes to choosing the paint, the type of paint you use depends on your particular needs. The oil/enamel paints many use are durable and work well, but they require a much longer drying period. Acrylic paints are easy to use and dry quickly. However, these paints will require a sealer to protect the newly painted surface. Citadel carries their own line of painting supplies in well ordered kits as well.
If you choose acrylic, I strongly suggest you paint only with artist grade acrylic paints. These are the paints you see in the artist section, not the craft paint you find in bottles. While they are inexpensive, craft paints are a bit more watery and have less pigment and give you less control in the application process. In contrast, Golden acrylic paints are expensive, but are high in pigment content. A major benefit using acrylic paint, is the vast variety of mediums available. For instance, if the base of your character is to be dirt, you can purchase a textured medium to mix with the acrylic paint to create a textured ‘dirt’ effect.
Basic Painting Process
To be honest, once you get going you’ll probably find your own rhythm, so I’ll just give you a basic process to get you started. The easiest way to begin, is to paint parts of the the figure with the main color or base coat first, letting it dry and painting the details last. For example, if your figure’s uniform will be mainly green, start by painting the entire uniform area green. Let that dry. Next, paint the uniform details in their respective colors. Paying close attention, and making sure you do a neat job staying withing the lines counts, and is the difference between a sloppy model and a well tuned one.
There are miniature artists who actually prefer to paint the majority of their pieces before they assemble their figure. This is perfectly acceptable. These artists feel that they can devote more time, focus and detail to armor and weaponry this way. After the pieces are painted, the model is glued together, touched up with a wash and dry brushing for highlights.
Watching Out For Stealing!
![]() One thing to remember while doing the work on the figures. Remember to keep them in a safe place. These things are precious for owners and there is a lot of cases of stealing. I recently came upon an interesting website showing the problem in the very graphic way (adult one!) – it’s called Young Perps and what it basically shows is the punishment methods for young guys stealing various goods in retail shops. It’s taboo and fantasy version of things happening in real life, but still – keep the fruits of your job safe. 🙂
One thing to remember while doing the work on the figures. Remember to keep them in a safe place. These things are precious for owners and there is a lot of cases of stealing. I recently came upon an interesting website showing the problem in the very graphic way (adult one!) – it’s called Young Perps and what it basically shows is the punishment methods for young guys stealing various goods in retail shops. It’s taboo and fantasy version of things happening in real life, but still – keep the fruits of your job safe. 🙂
Painting Techniques
httpss://www.youtube.com/watch?v=43WBYCcrsyc
Once your figure is painted just the way you’d like, feel free to see if you like to dry brush over it, or stain it. Staining, also known as a ‘wash’, is quite a simple matter. Once dry, take a dab of burnt umber or burnt sienna and mix with water and apply to the figure, and immediately wipe off. The dark pigment of the paint will remain in the sculpted clothing folds, facial features, and crevices after it is wiped off. Using a wash is the best way to give a detailed feel and professional look to your paint job.
Dry brush is another technique, and it’s used to give highlights to your figure. This is when you take a dry brush, such as a flat, and dip it into a color, lightly and brushing over the figure. Feel free to experiment with this technique, just be warned that too much dry brushing can accidentally give your figure a rushed look. It should be used for application of accents only.
Once you’ve finished with your figure, set it aside to dry thoroughly. For miniatures painted with acrylic paint you’ll need to apply a clearcoat sealant in either glossy or matte. Without this finish, you risk your acrylic paint rubbing off over time. You can purchase an inexpensive Krylon clearcoat finish or any number of water based polyurethane sealers you’ll find in the craft section of your store. Apply the clearcoat finish in thinly sprayed or painted coats only.
Brushes
Choosing the perfect brush is a personal matter, often what one painter feels comfortable with, will not work with another. I suggest a good starting point are Windsor and Newton Series 7 Miniature brushes, which come in sizes 000 to 6. These give you excellent control over paint flow when doing detail work. I suggest you stay away from cheap ‘craft brushes’, as these will offer you no control whatsoever.
Conclusion
There you have it, a basic beginners guide to painting your first Warhammer figure. Whether your building up a massive world for the Warhammer Age of Sigmar or the dark, dystopian, futuristic world of Warhammer 40,000, following these basic painting tips will give you a good starting point. The deeper you get into the Warhammer world, the more painting techniques you’ll learn from other gamers at Warhammer events such as Warhammer Fest, along with conventions and tournaments. The world of Warhammer is massive, and I’m sure you’ll find it to one you’ll be involved with for many years to come.
Hi! The figure painting is a fine artwork on any form of painting media. The primary subject of figure painting happens to be the human figure.